I hope I get the job :)
This is gorgeous!!!
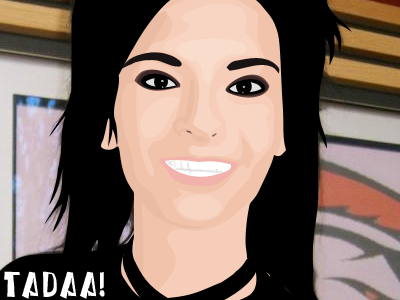
Tutorial 2 - The Vector Tutorial

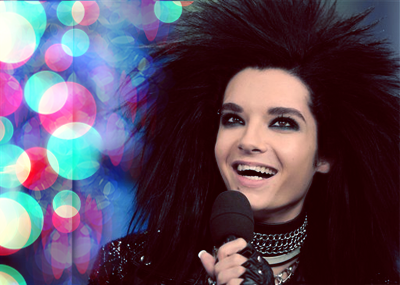
I'm going to use this picture of Bill. The original picture is much bigger, and I only resized this picture for the entry.
*** Make sure you choose a larger picture and a picture which you really like***
(Well, you don't want to stare at poop or something for 5 hours, right?)
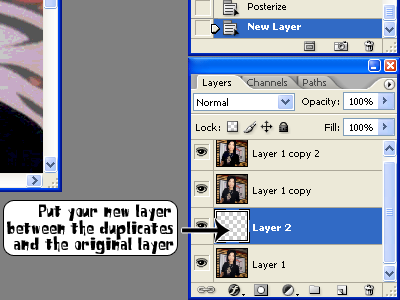
Ok, then I duplicated the picture twice (Ctrl + J) and the topmost layer, go to Image > Adjustments > Posterize > 10.
Now create a blank layer (Ctrl + Shift + N)
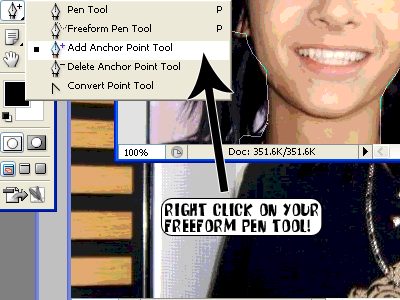
Now click on your freeform pen tool
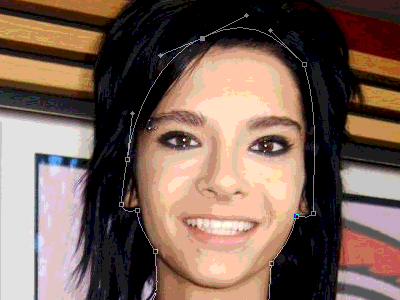
 and draw a rough outline outside the first layer you want to vector (I recommend you start with the face first)
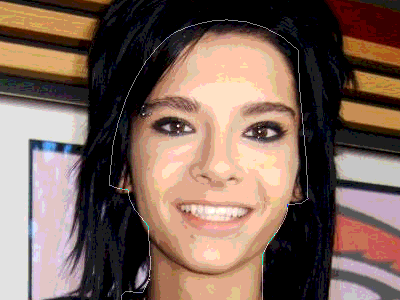
Ha, told you my image is huge.
Ok, anyway now you cant see this gray lines which you have just outlined. So now, click on the "Add Anchor Point Tool"

Now, drag your points around with the "Add anchor point tool"
Usually you will have problems here, but play around the points and if you have excessive points at a place, you can remove some of them with the "Delete Anchor Point Tool"

*** Since its only the first layer, you do no need to be so precise and end nicely and the outlines of his face. Put your vector alittle bigger (It doesnt matter if your layer now covers his hair, cause later the hair layer will be on top of the face layer anyway) ***
Do something like this ... ...
Now choose colour :
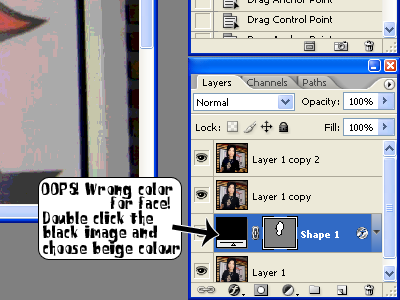
Or you can use eyedropper tool to choose the colour. I used #f6cdb8
Actually I have a "Skin Scheme" and I would follow it. Haha.

Now slowly vector out the different shades on the face.
***TAKE NOTE THAT WHERE THE LAYERS ARE PUT AT IS VERY IMPORTANT***
And to see how your vector is coming along, you can ... ...

For the other consecutive layers, please be more precise :)
(And pleeeeease! There are points to be dragged around and you can 'bend' it and make it curve, so please, play around with this cause this will prevent your vectors from becoming too stiff)
***It will be good to name your layer too. E/g : Hair, Right-Nostril, Left-eye-eyeliner etc***
No comments:
Post a Comment